Opening ports on a Windows VPS is fairly easy. Follow these steps:
- Log in to your VPS.
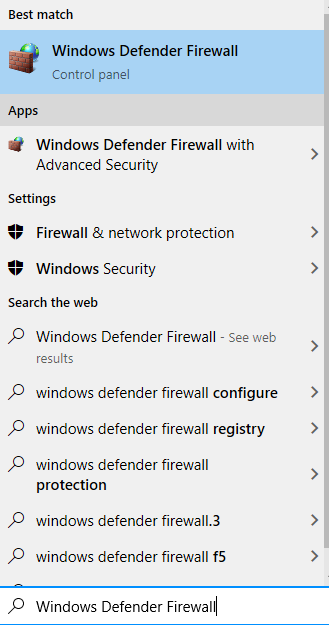
- Search in the search bar for "Windows Defender Firewall". You will see something like this.

- Once that is opened, click "Advanced Settings" on the left-hand column.
- A new Window opens after doing so. Take note of two tabs at the top left, "Inbound Rules" and "Outbound Rules". Each of these are important. Inbound is what you can think of as traffic or network information filtering into the VPS. Outbound is the opposite, it is information filtering out of the VPS.
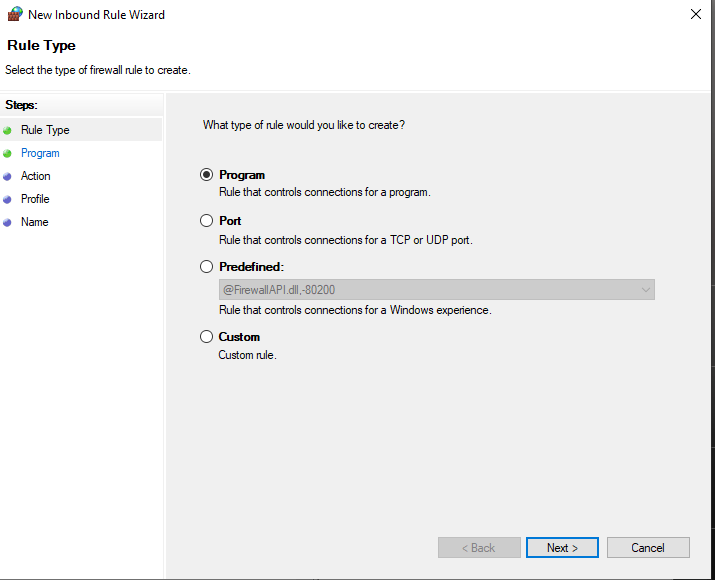
- First, start with Inbound rules. Once you click Inbound Rules, click on "New Rule..." on the top left. You will find this:

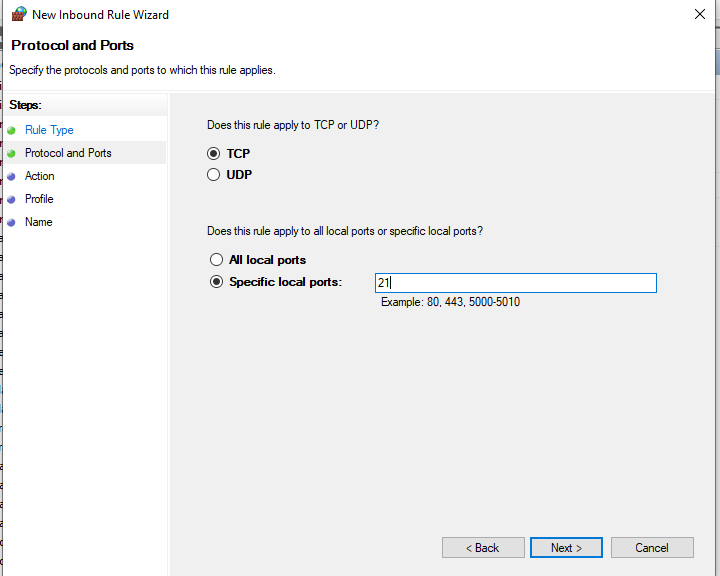
- Typically you will choose "Port". Once clicking port, click next. The next page has a selection for TCP or UDP. You will only be able to choose one for each rule. So for instance, if you are opening port 21, start with TCP. Once making sure TCP is selected, you will type 21 into the text box. It will look something like this:

- Note that you will put whatever port you need. Also, you can put multiple ports in at once by separating them with commas (EX: 21,22,23). After putting your port(s) in click next.
- Make sure the next page has "Allow the connection" selected". Click next.
- Make sure each tick box is checked for "Domain", "Private", and "Public". Click next.
- Give it a name and then hit finish.
- You will repeat this step again, only the next time choose UDP instead of TCP.
- Once both TCP and UDP have a rule for your port(s). Repeat the steps, but only this time for Outbound rules. After doing so, your port(s) should be open.
If you have issues, please create a ticket.


