How do I install and setup WordPress?
Setting up WordPress is a pretty straight forward process with our Web Hosting! It's as easy as just a few clicks and WordPress is installed!
Prerequisites
- An active domain (You can register one with us while purchasing Web Hosting)
- Web Hosting with us
- Correctly set DNS records to your Web hosting
If you registered a domain with us, the name servers and records are automatically setup! If not, change your name servers to:
ns1.silverhostingnetwork.host
ns2.silverhostingnetwork.host
Step 1 - Login to your Web Hosting:
Login to your Web Hosting, which is the Direct Admin panel through us.
There is a direct login button in our client area when a Web Hosting plan is active.
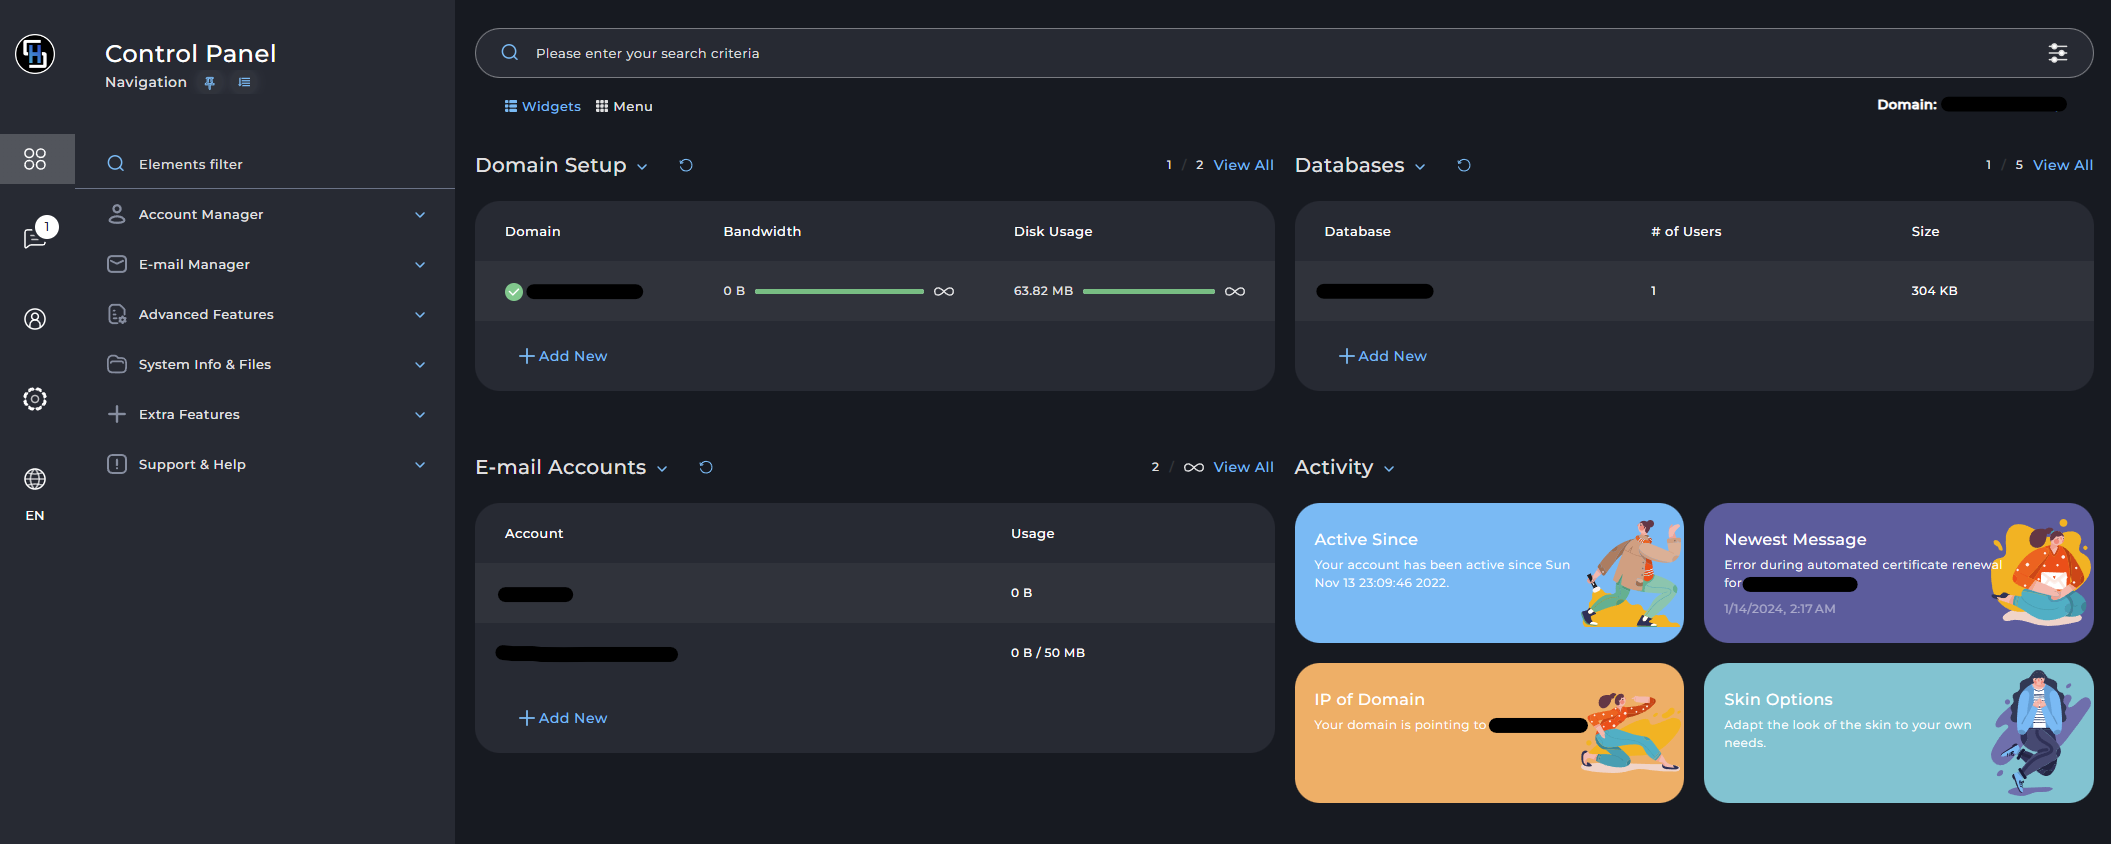
Once you are logged in, you will be met with the following screen (Unless your layout is different, but the functions are the same):

Step 2 - Create a database:
Now, we will need to create a database for our WordPress site. On the home page of Direct Admin, click on "Add New" button.

You will be brought to a screen to name your database, which can be anything. After naming it, click "Create". A new window will pop up with The database username, and password. Copy this to a save and secure location.
Step 3 - Open WordPress Manager:
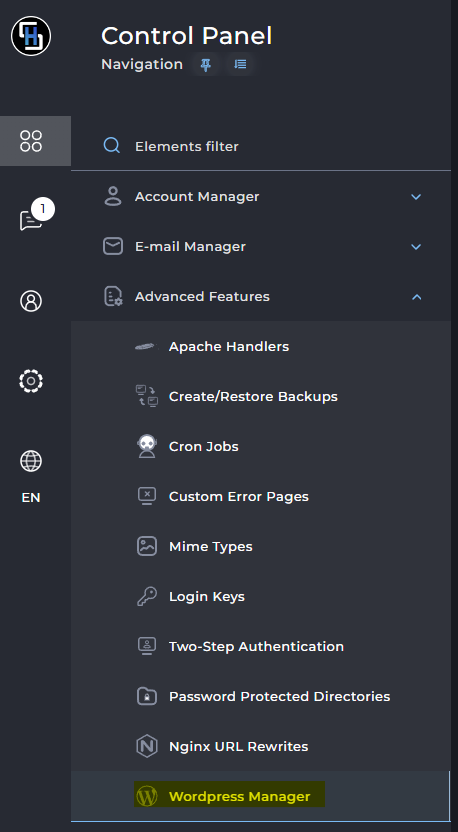
Now that you have a database created, it's time to deploy WordPress! Using the menu on the left side, navigate under "Advanced Features", and click on "Wordpress Manager".

Step 3 - Choose your domain/subdomain to install WordPress on:
On this page, you will be displayed with current WordPress installations (If there is any) and domains/subdomains without WordPress installed. Choose the domain/subdomain you want to install Word and click on the icon under "Action".

Step 4 - Configure the installation:
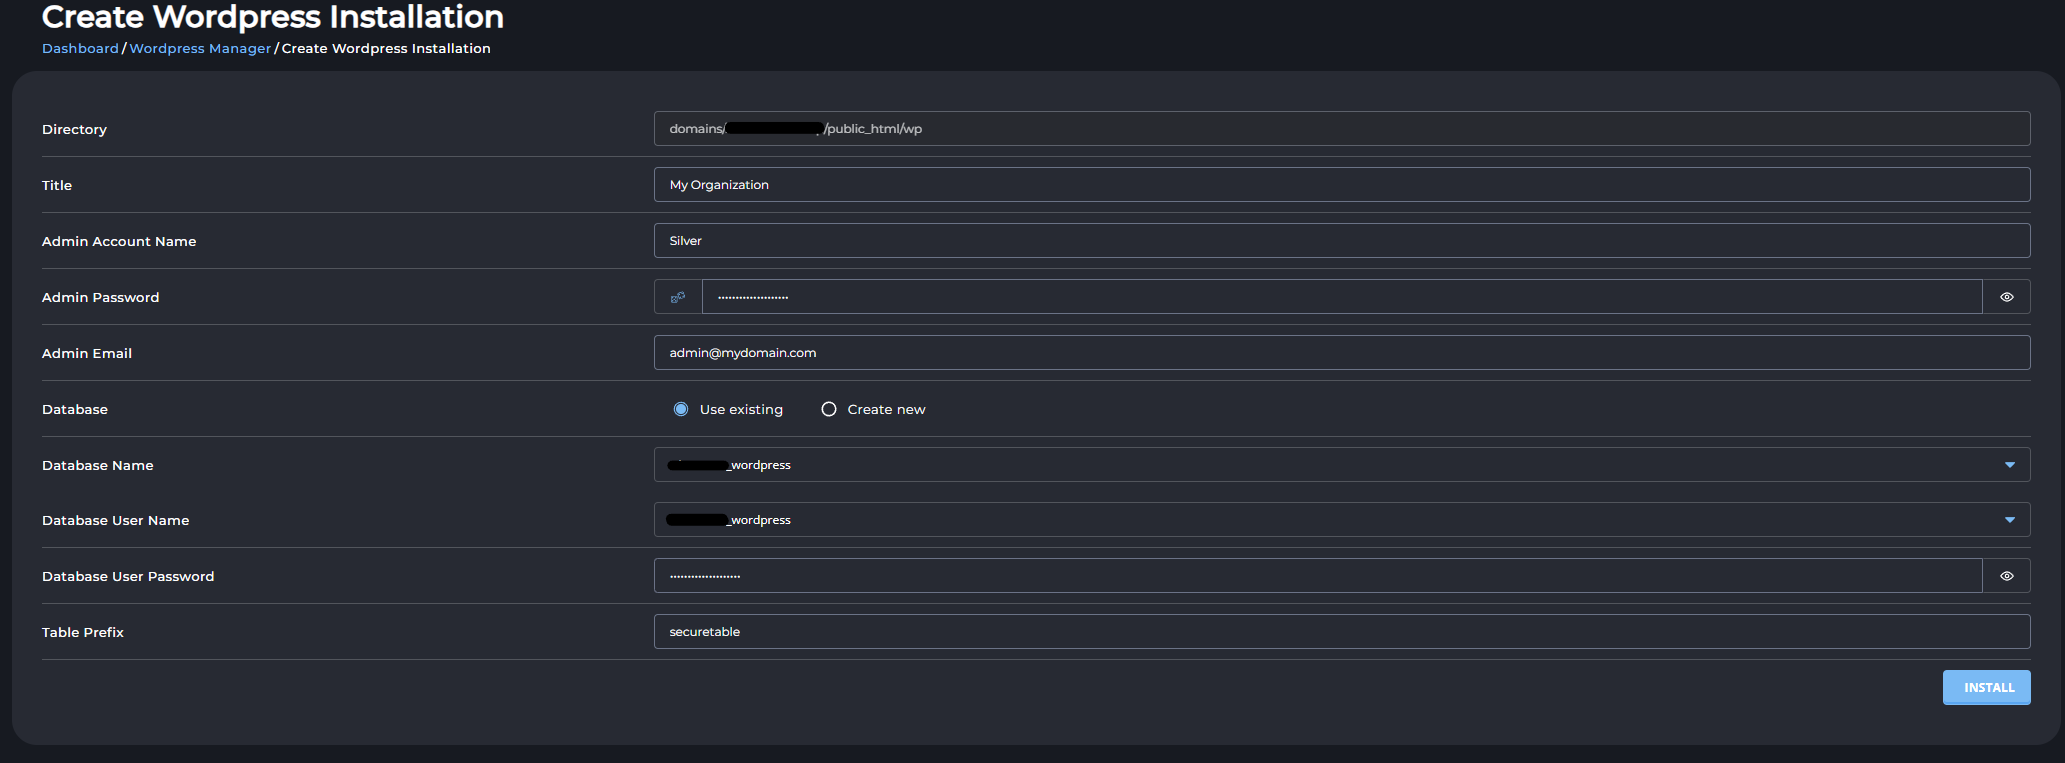
Now you will be met with a configuration page for your site. Here is a brief overview of what you should do:
"Title" - This is the title of your site, which is normally your Company / Organization name.
"Admin Account Name" - This is your admin account that you will use to login to the site.
"Admin Password" - Set your password for your admin account.
"Admin Email" - The email of your admin user.
"database" - Select "Use existing".
"Database Name" - Select the database that we created earlier.
"Database User Name" - Select the username that was created automatically.
"Database User Password" - Type in the password that was created for the database.
"Table Prefix" - STOP! Make sure you CHANGE this table prefix. The default for WordPress is "wp_" which is vulnerable. In this example, we changed it to "securetable". But it can be anything.

Then press "Install" at the bottom right. Await for the page to refresh indicating completion.
Step 5 - Login to your Website:
The website is now installed. You can access it by going to your domain /wp-admin. For example, "https://mydomain.com/wp-admin.


